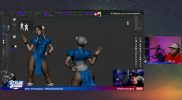
Demystifying Post-Production: 3D Printing | Week 2
In this series, Expert Lead ZBrush Trainer and Training Manager Ian Robinson will be showcasing how to break up
a 3D model in ZBrush to be manufactured with Resin 3D Printing. From creating key cuts to optimizing the model to
scale settings for final export, this series is designed to help you bring your digital models in the physical world.
00:00:00 Waiting Loop
00:01:47 Welcome
00:02:25 Housekeeping
00:06:07 Summary, Part 1
00:07:55 TMNT, Key Cut
00:08:04 __ About hiding Key Cuts
00:09:54 Q – Where to find Part 1
00:10:48 __ Forearm [1], Split Parts
00:14:20 __ Forearm [2], DynaMesh
00:17:21 __ Handling Floating Geo
00:18:04 __ Check MeshIntegrity
00:19:32 __ Combining Subtools
00:21:46 __ Key direction
00:23:18 __ Forearm [3], Creating Key
00:24:19 __ Define – IMN Brush Key
00:25:10 __ Forearm [4], Insert Key
00;25:46 __ Forearm [5], Transparency, check
00:27:23 __ Forearm [6], Adjusting Key
00:28:46 __ Repeat that process, result
00:31:04 Q – Hard Edge from Knife Cut
00:32:14 __ Summary, Recap, Forearm [7]
00:32:48 Defining the Scale, Size
00:33:32 __ Scale Master
00:33:36 __ New Bounding Box Subtool
00:34:35 __ Set size, mm, cm, in, feet
00:35:10 __ Define Bounding Box Size, XYZ
00:36:04 __ Resize Subtool
00:36:18 Q – Control minimum thickness
00:36:39 Q – SelectRect, Alt, v. KnifeRect
00:38:47 Q – Scaling base, not height
00:41:06 Q – Resolution Picker [1], DynaMesh
00:43:01 Q – Rotating keys, Articulation
00:44:28 Merging and Fixing
00:44:52 __ Fixing a hole, gap, solid
00:46:09 __ Parts penetration, fix
00:48:01 Q – What kind of paint
00:49:02 __ Merging Folder
00:49:47 __ Resolution Picker [2], DynaMesh
00:50:21 __ DynaMesh set History Marker
00:51:23 __ Ambient Occlusion View
00:52:06 __ Handling Details, Save History
00:56:25 Q Thickness, Polish, creates holes
00:57:05 Q Print in pieces or as a group
00:59:40 Print Preparation
01:00:01 __ Check with a cube, Forearm [8]
01:03:02 __ Fixing inside hole [1], inside
01:03:18 __ Fixing inside hole [2], BMV, move
01:03:34 __ Fixing inside hole [3], Auto masking
01:04:39 __ Fixing inside hole [4], Why we fix it
01:08:11 Q – Printer model, what do you use
01:09:10 Q – 3D Print process v mold injection
01:11:00 Q – How long – to get as good as Ian
01:12:16 __ Continue fixing; watch out for masks
01:15:24 __ Summary Main Steps
01:15:50 Q – Device on the Xencelabs screen
01:16:37 Q – Does the printer recognize multiple meshes
01:19:01 __ Print-Prep-Check
01:19:46 Final Cut Session
01:20:52 __ Bounding box check
01:21:14 __ Scale Master – Error Alert
01:23:02 Q – Optimal specs Mac to run ZBrush
01:25:58 Q – Tips and skills break into printing
01:27:25 __ Merge and define cuts, for Example
01:29:51 __ Forearm [8], Key Cut, subtract
01:31:03 __ Forearm [9], thickness check
01:31:59 __ Forearm [10], adjustment thickness
01:33:05 __ Forearm [11], Key Inflation, check
01:38:53 __ Forearm [12], hard edge, treatment
01:40:58 __ Forearm [13], watertight check
01:41:39 __ Forearm [14], Decimation Master
01:42:12 __ Tip – details, texture preservation
01:43:24 __ Example, how all Keys are done
01:44:45 __ Tip – save versions of your model
01:46:18 Q – Group visible button
01:47:04 Wrapping up
01:47:21 Housekeeping
01:50:02 Thank you and bye